Clematis г -жа Cholmondeli
Съдържание:
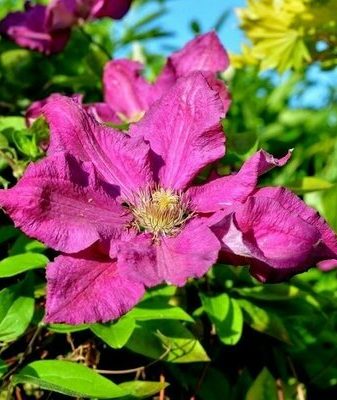
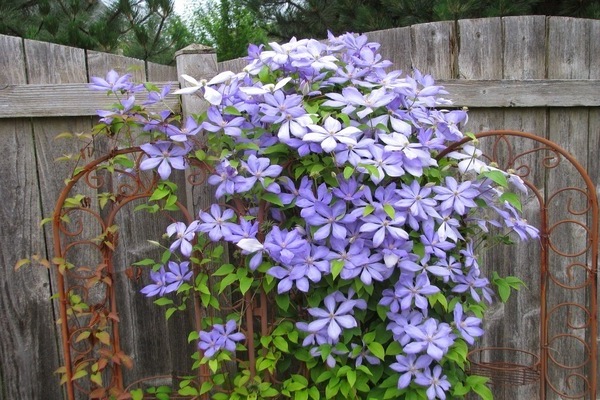
Clematis г -жа Cholmondeli: описание на сорта
Clematis г -жа Cholmondeli: снимка
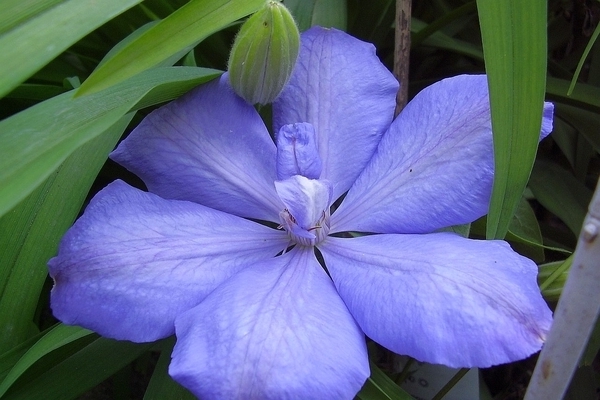
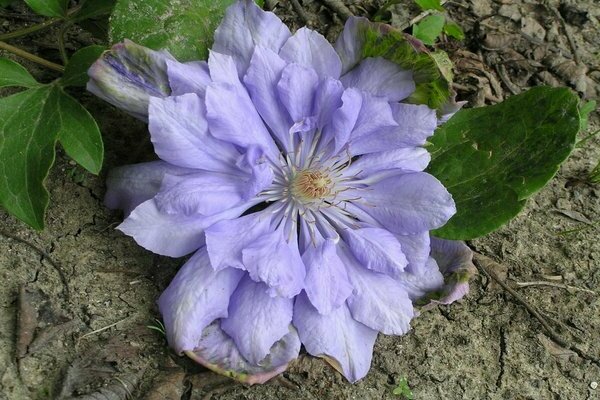
Клематис г -жа Cholmondeli е многогодишно декоративно растение, което има дълъг период на цъфтеж. достойнството на сорта се крие в обилния и дълъг цъфтеж от май до август. Поради наличието на големи люлякови цветя, културата изглежда добре до вечнозелени и широколистни култури. Растението се характеризира с непретенциозна грижа, изобилен и живописен цъфтеж. Растението принадлежи към лиани, което му позволява да се навива по опори от естествен и изкуствен характер. Ако се грижите правилно за растението, то може да достигне височина около 3-3,5 м. Цветовете на растението са големи по размер, диаметърът може да достигне 25 см. Цветът на пъпките може да бъде различен: люляк, светъл синьо, лавандула и люляк. Средата на цветето е изпълнена с тичинки вътре, които са малки по размер, жълти и светлокафяви, кадифени на цвят. На млада издънка цветята имат проста структура, на възрастни са полу-двойни. Листата на растението са малки по размер - 5 см дълги, 2 см широки, продълговати, заострени, светлозелени на цвят.
Към коя група за подрязване принадлежи сортът?
Подрязването на клематисите на г -жа Cholmondelli може да помогне за регулиране на времето на цъфтеж на дадено растение. ако растението принадлежи към подрязване тип 2, то трябва да е слабо. Този вид растение цъфти от май до август. Г -жа Cholmondeli е подрязване тип 3. Такива растения започват да цъфтят през юли до септември. И в двата случая цъфтежът ще бъде изобилен и дълготраен. Растението е бързо растящ хибрид. След резитбата растението се нуждае от около 1 месец, за да се възстанови.
Clematis г -жа Cholmondeli Засаждане и грижи
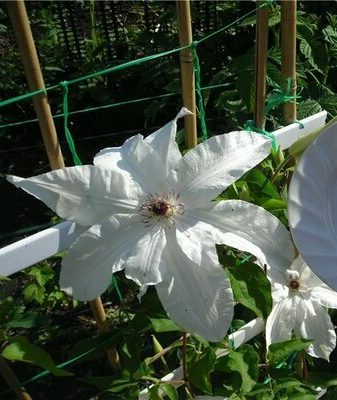
Clematis г -жа Cholmondeli: снимка
За засаждане на клематис г -жа Cholmondelli е най -добре да изберете април или края на септември. Предварително ще трябва внимателно да помислите за мястото, където планирате да отглеждате растението. Растението може да расте добре както на слънчево място, така и на частична сянка. Не забравяйте да поставите опора, така че растението да може да расте и да се развива нагоре. Преди засаждането кореновата система на растението трябва да се накисне във вода за около 30 минути. През това време трябва да се изкопае земята и да се направи необходимата подхранка. Необходимо е също така да се включите в приготвянето на хранителна формула. За да направите това, трябва да вземете хумус, пръст, дървесна пепел. Всички съставки се приемат в същото количество. Необходимо е да се подготви яма за кацане. Тя трябва да бъде с подходящ размер, така че корените, слоят тор и кореновата шийка да могат лесно да се поберат там. На самото дъно на ямата е необходимо да поставите слой от приготвената хранителна смес, да поставите растението отгоре, като изправите кореновата система. Инсталирайте кореновата шийка така, че да се намира под нивото на земята. Това ще помогне да се предпази от зимни студове. Отгоре е необходимо да се добави пръст и да се уплътни добре. След засаждането растението ще трябва да се полива обилно и да се предпазва от пряка слънчева светлина. Влажната почва ще трябва да се мулчира, за което се вземат дървени стърготини или сено. Грижата за растението няма да бъде трудна. Културата трябва да бъде снабдена с поливане, разхлабване на почвата, подрязване на леторастите, премахване на плевели.Поливането трябва да бъде умерено, но редовно, тъй като почвата изсъхва. не трябва да се допуска застой на влага. Това може да доведе до развитие на гъбични заболявания. През първата година след засаждането растението не се нуждае от торене. Започвайки от втората година от живота, торовете трябва да се прилагат по следната схема:
- Когато растението започне да расте преди появата на пъпките, е необходимо да се прилагат торове, съдържащи азот.
- Когато се появят съцветия, е необходимо да се прилагат сложни торове.
- Когато цветята паднат и растежът приключи, в края на август трябва да се внасят торове, съдържащи фосфор и калий.
Пъпките, които се появяват през първата година от живота на растението, трябва да бъдат отрязани. За да се подобри изобилието от цъфтеж през следващите сезони. За развитието на страничните издънки е необходимо да се прищипе върхът. Подрязването може да се извърши още през първата година от живота на растението. през есенния период е необходимо да се съкратят всички издънки, като се остави само централното стъбло, чиято дължина ще достигне 0,5 м. растението е на повече от 1 година, трябва да се отреже през есенния период преди настъпването на студа . Всички сухи, повредени и болни издънки трябва да бъдат премахнати. След това се извършва оформяща резитба. Има универсален метод за подрязване, подходящ за всички клематиси - премахнете само горната част на 1 издънка, запазете дължината на следващата около 15 см. Така ще подмладите растението, ще стимулирате равномерния му цъфтеж и развитието на странични издънки през пролетта.
Извършваме подготвителни работи за зимния сезон
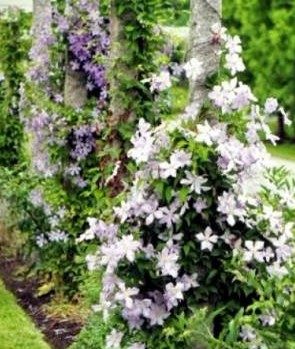
Clematis г -жа Cholmondeli: снимка
Преди да поеме приюта на Clematis г -жа Cholmondelli за зимата, той се нуждае от лечение за различни гъбични заболявания. Необходимо е да се обработи както самото растение, така и зоната до него с разтвор на фунгицид, можете да добавите малко количество дървесна пепел отгоре. Само тогава растението може да бъде покрито. С появата на първата слана растението трябва да бъде покрито за зимата. олющване на основното стъбло с торф или градинска почва в самата основа на растението. на височина защитната могила не трябва да пада под 15 см от земята. Това може да предпази растението ви от замръзване през нощта, през есента. След като температурата на въздуха падне под 0 градуса, е необходимо да се подслони издънките. Като начало зоната до храста трябва да бъде облицована със смърч, сухи клони или сено. Клематисите трябва да бъдат извадени от опората и спуснати на земята, така че растението да лежи върху субстрата на растението. Ако издънката е дълга, тя трябва да бъде внимателно усукана. След това можете да покриете растението с покривен материал. Това може да бъде: покривна хартия, подсилена или с мехурчета пластмасова обвивка или агрофибър. Върху получената структура трябва да добавите слой почва, клони и суха зеленина. След това отново се добавя покривният филц или покривният материал. Също така не забравяйте да притиснете покривния материал с дъски, така че силните ветрове да не повредят конструкцията. С падането на пера от сняг, той трябва да бъде хвърлен отгоре върху конструкцията. Това ще осигури допълнителна защита на растението от ниски температури и вятър.
Clematis г -жа Cholmondeli: репродукция
Най -добре е да използвате метода на разделяне на храста, който се използва през пролетта или есента. трябва да изберете силно и добре развито растение, което ще достигне възраст от 5 години. Необходимо е да се изкопае растението с корени, с помощта на лопата е необходимо да се отделят определен брой деца, които ще имат по 2-3 пъпки. След това се засаждат като самостоятелно растение.
Болести и насекоми -вредители
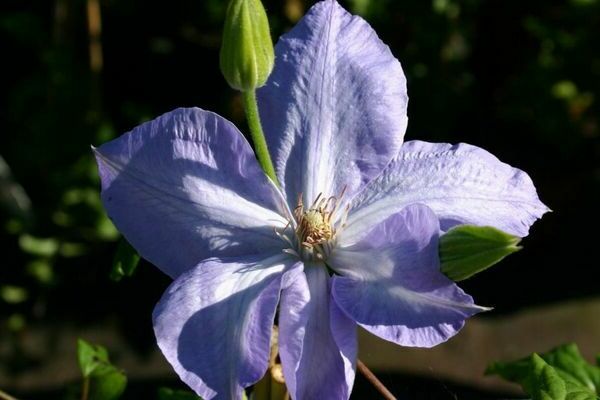
Clematis г -жа Cholmondeli: снимка
Ако Clematis Mrs. Cholmondelli е засадена твърде дълбоко, тогава растението е способно да претърпи различни гъбични заболявания.За превантивни цели е необходимо да се регулира количеството и качеството на поливането, но в същото време да се предотврати застоя на влага. Такива заболявания са характерни за много хибридни клематиси. Растението може да бъде подложено на заболявания като сиво гниене, брашнеста мана, ръжда. Ако искате да избегнете такива неприятни ситуации, тогава е необходимо да извършвате третиране с разтвори на фунгициди 2 пъти годишно. Също така растението може да бъде атакувано от листни въшки, паякови акари и охлюви, които увреждат листата и стъблата на растенията. Ако забележите появата на такива насекоми, е необходимо да напръскате храста с разтвори на инсектициди.
Г -жа Cholmondelli Clematis е красиво декоративно растение, което е подходящо за отглеждане в различни природни условия. Ако засадите растението правилно и осигурите подходяща грижа, тогава няма да имате проблеми с отглеждането на растението. Поради дългия си период на цъфтеж, той е подходящ за отглеждане в лятна вила.